Introduction
Are you stuck trying to find a way to add shapes in word?
Are you interested in finding away to enhance your document?
Well look no further, I will answer all your questions!
How to Insert It
- Find it
- Click it
- Choose it
- Insert It
Step 1: Find it
After opening a word document, you will see a list of tabs at the top
![]()
At the top, select Insert
![]()
Step 2: Click it
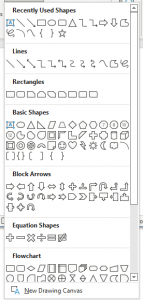
After selecting Insert, you will see a list of options! Shapes should be next to Pictures near the left side of the tabs. Click Shapes

Tip: Make sure to use the App not the Online Version because it doesn’t have it
Step 3: Choose it
After clicking Shapes, it gives you a list of options. Choose your desired Shape
Step 4: Insert It
After clicking on it, you mouse pointer will change to grid-like icon. Then, hold your left button and move the cursor, then let go when you are happy with your product
Tip: The shape is not final (also you can move it,) so you don’t worry
Fundamentals
The basics of how to edit your shapes
Move: Hover over the shape, hold down your left button, move, then let go
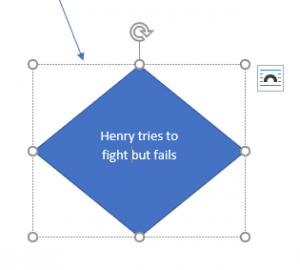
Type: Click the shape and start typing
Shape: Click the shape and move the white dots
Rotate: Click the shape and move the reverse sign
Advanced
More advanced techniques to modify your shapes
Shape Fill: Click the shape, click Shape Fill, click on desired color and it will fill in the color

You can also add a Picture, Gradient, and Texture

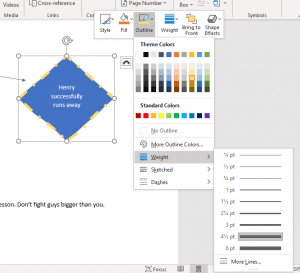
Outline: Click the shape, click Outline, and click desired color
You can also edit the thickness of the outline (Weight,) the sketchiness of the line (Sketched,) and the line’s look (Dashes)
Style: Click the shape, click Style, and click desired style
- Styles are presets of Outline and Shape Fill
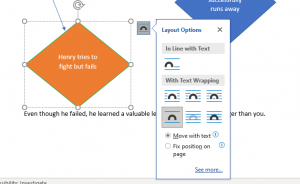
Text: You can change the text’s placement outside of the shape. For example, I made the text under the shape. You can make the image appear behind, in front, and many more! Click the shape, click the black rainbow icon, then test out the various text placements
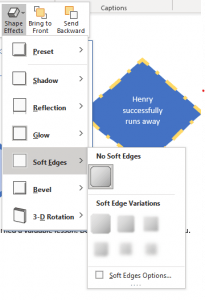
Shape Effects: Click the shape, click Shape Effects, and click desired shape effect
Shape Effects are features that changes how the shape looks from small to big edits
There are Presets, Shadow, etc.
Uses
There are many uses of Microsoft’s Shapes
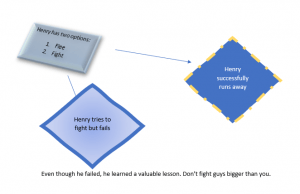
For example, Shapes are used to make flowcharts
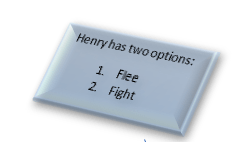
Or you can make cute images to send to your colleagues

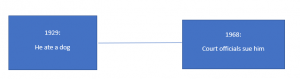
Or you can make a timeline
There are many other uses for shapes, the options are limitless!
Conclusion
Boom! Now you learned how to insert a shape in four easy steps! As well, you learned the basics of how shapes work, and advanced techniques to spice up your word document!
If you have any problems, I’m happy to reply in the comments!
Thank you for reading!